How to set parental controls on a Quantum Fiber modem
Quantum Fiber gateway modems offer parental controls through the secure settings. Learn how to block content and create WiFi schedules for devices connected to your WiFi network.
If you have 360 WiFi, see how to set parental controls in the Quantum Fiber app instead.

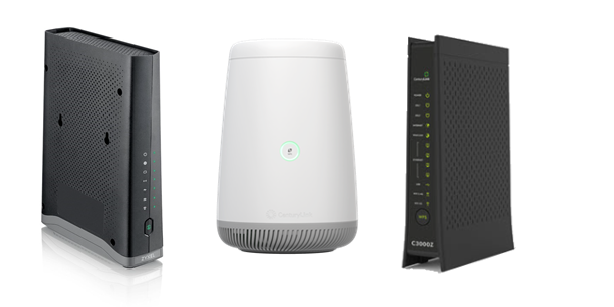
You can set parental controls in the user settings (GUI) for the following modems:
- C4000
- C3000
- C2100
- C844
- C424
The C3510 modem has a different settings site. See the instructions for parental controls on the C3510.
Tips for signing in
1. You must be connected to your Quantum Fiber network to access the settings site. The site will not load on another network.
2. Your browser may flag the URL as a security risk because it starts with http (not https). Rest assured, it is safe and you can proceed through the warning.
Sign in to the modem settings
1. On a computer or tablet that is connected to your Quantum Fiber network, open a web browser and type http://192.168.0.1 into the address bar.

2. Sign in to the secure user settings (GUI) with your Admin Username and Password. These are printed on the sticker found on the side of your modem. These are different from your WiFi network name (SSID) and password (key).
Options vary by modem model
Features and options vary slightly on every modem model. The options listed here may not be available on your modem.
Once you're in the main menu of the modem settings, see the sections below to learn how to block content and create access schedules for devices connected to your WiFi network.
How to block websites and services
You can create lists of specific websites and services you want to block on individual devices connected to your network. "Services" refers to types of applications, such as instant messaging, email, or gaming systems from using your network.
Click the options below for detailed instructions.
- Select the Advanced Setup option in the main menu.
- Select Website Blocking from the Advanced Setup menu on the left-hand side.
- Select the device on which you want to block content from the drop-down, or manually enter the device’s IP address.
- After selecting the device, enter the website(s) you want to block. You can add multiple sites and they will appear on the “Blocked Website List” at the bottom. You can also remove any blocked site from the list if you want to unblock it.
- When you’re finished adding or removing websites, click Apply to save your changes.
- Select the Advanced Setup option in the main menu.
- Select Service Blocking from the Advanced Setup menu on the left-hand side.
- Select the device on which you want to block services from the drop-down, or manually enter the device’s IP address.
- Select the service you want to block. For example, you can block instant messaging from your child’s computer or tablet, or block World of Warcraft from being played on the family PC. You can Create New Rule to add more blocks. Just as with the blocked websites list above, you can also remove blocks from the Service Blocking List at the bottom of the screen.
- When you’re finished adding or removing rules, click Apply to save your changes.
How to set access schedules
You can set schedules to block access to WiFi at certain days and times. There are two ways to do this: network-wide, which will affect every device connected to your network, or by device, where only specific devices are blocked.
Click the options below for detailed instructions.
- Select the Wireless Setup option in the main menu.
- Select Wireless Schedule from the Wireless Setup menu on the left-hand side.
- Select Enable to turn on scheduling mode.
- Create schedules for all connected devices by choosing which days and times you would like your entire network to be offline (blocked).
- Select Apply to save your changes.
- Select the Advanced Setup option in the main menu.
- Select Access Scheduler from the Advanced Setup menu on the left-hand side.
- Select the device you want to schedule from the drop-down list, or manually enter the device’s IP address.
- Set up the days and times you want to allow that device to be online.
- Select Apply to save your changes.
More from our blog
Check out these helpful blog articles to learn more about internet safety for kids.
Related topics
Was this information helpful?


