If you received new WiFi 7 pods, follow the steps in the Quantum Fiber app to install them. Scroll down to see an overview of the process, including screenshots.
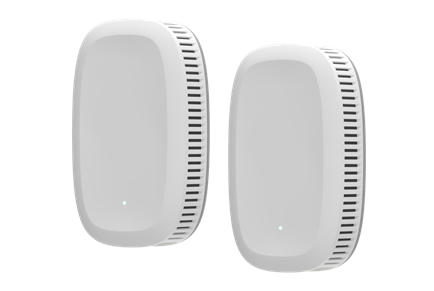
WiFi 6 pods
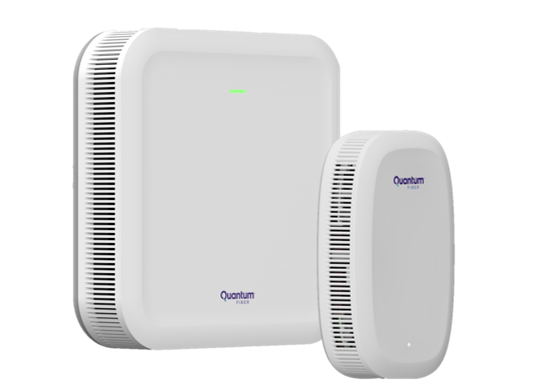
WiFi 7 pods
Important: Do not unplug current WiFi 6 pods (Q9500) until step 8.
Do not mix old and new pods on your network.
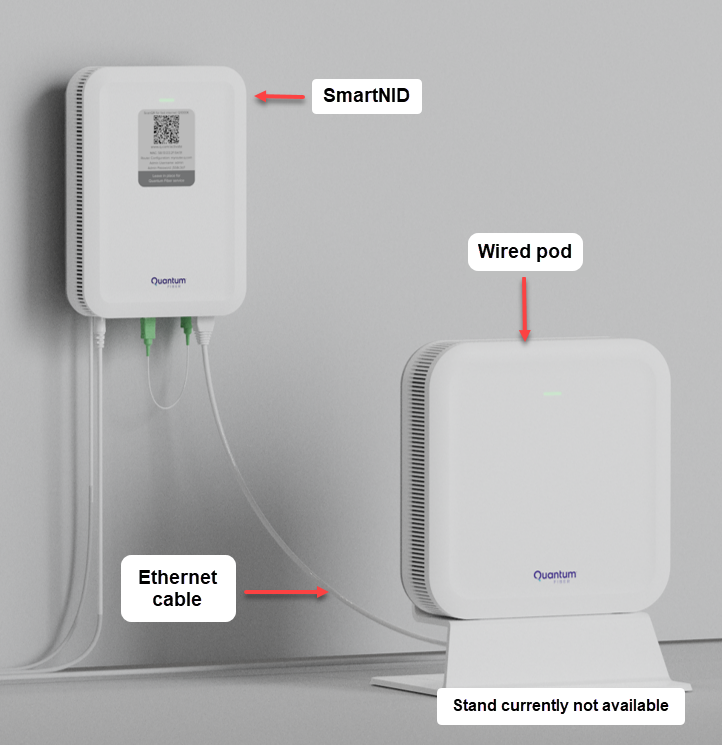
CAUTION: Do not attempt to remove the wall-mounted SmartNID. It must remain connected to provide your internet service. The new wired pod looks similar. Not sure which is which? The SmartNID is rectangular in shape, while the wired pod is square. The SmartNID is attached to your wall, and has green fiber connectors on the bottom and a sticker on the front that says "Leave in place for Quantum Fiber."
Why are there fewer WiFi pods?
With WiFi 7, most homes get excellent whole-home coverage with just one or two pods! Many households will receive one WiFi 7 pod; if you currently have more than four WiFi 6 pods, you will receive two WiFi 7 pods. See WiFi 7 FAQs
Download the Quantum Fiber app
Before you start
Before you get started swapping your equipment to WiFi 7, follow these two steps:
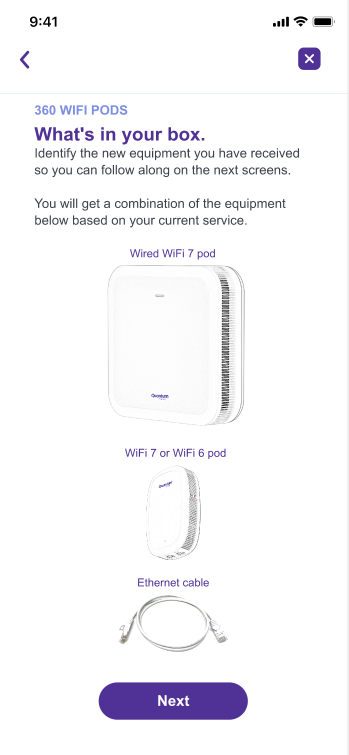
1. Unpack the box you received recently from Quantum Fiber. It should contain:
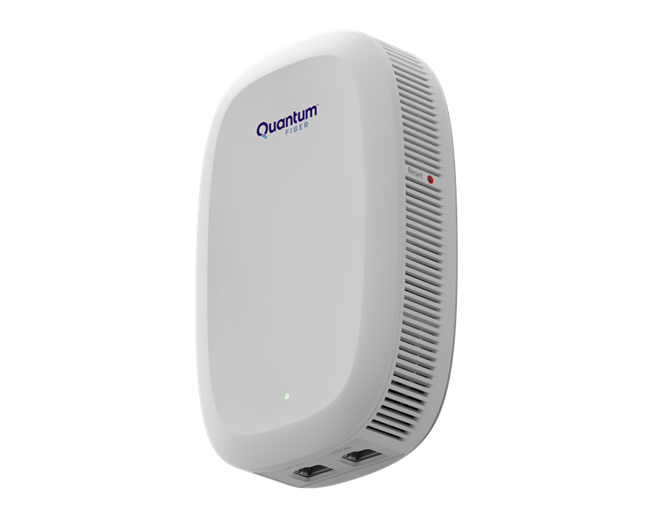
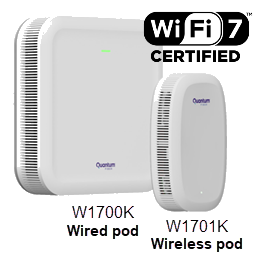
Wired pod W1700K
Caution: Not a modem! Do not attempt to replace your SmartNID with this device.
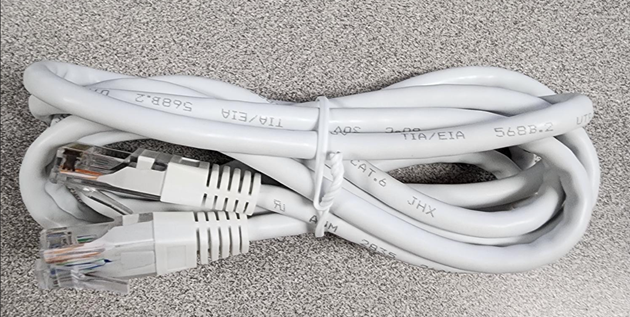
Cat6 Ethernet cord
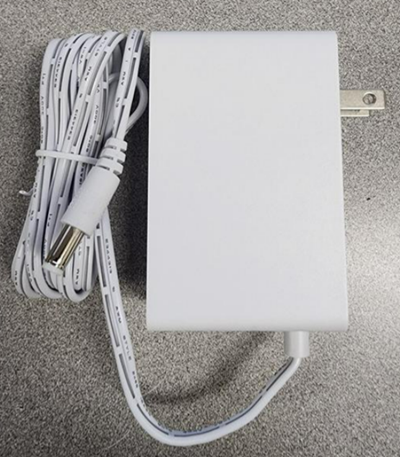
Power cord
Depending on your setup, your box may also include:
Wireless pod W1701K
2. Locate your current WiFi network name and password. You'll want these for a later step. If you lost or forgot them, it's okay—you can create new ones (only this will require that you reconnect all your devices).
Connect the NEW wired pod
You'll start by connecting the new wired pod to your SmartNID, creating your WiFi network, then disconnecting the old one.
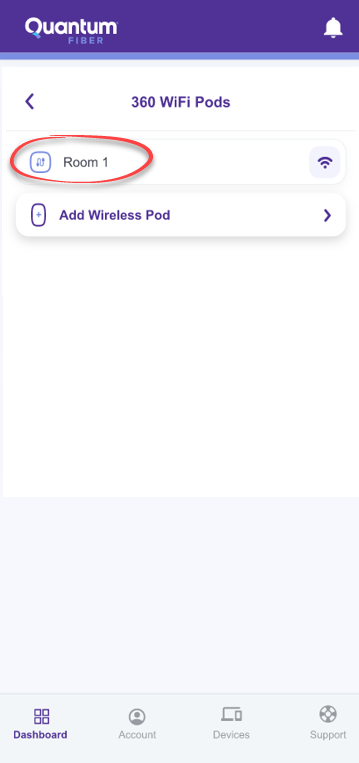
3. Open the Quantum Fiber app and sign in. Tap on 360 WiFi Pods.
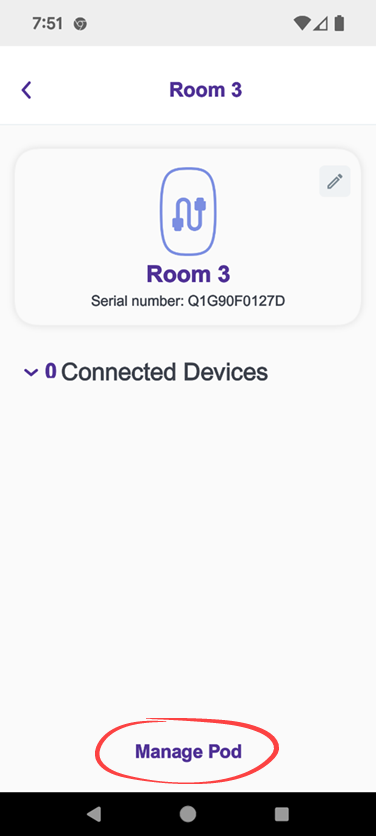
a) Tap the name of the wired pod (typically the first one).
b) Tap Manage Pod.
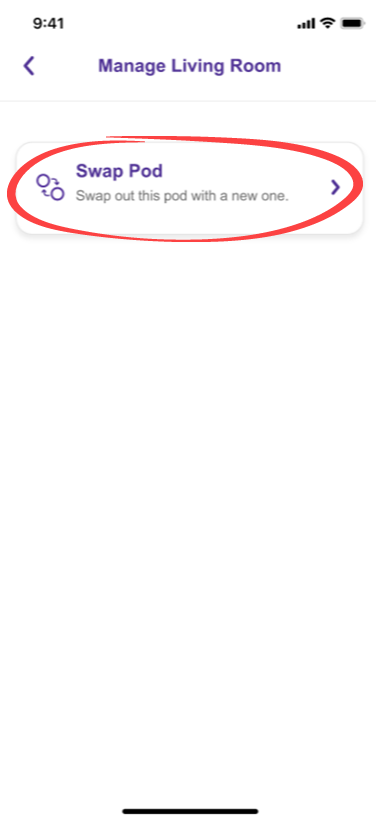
c) Tap Swap Pod.
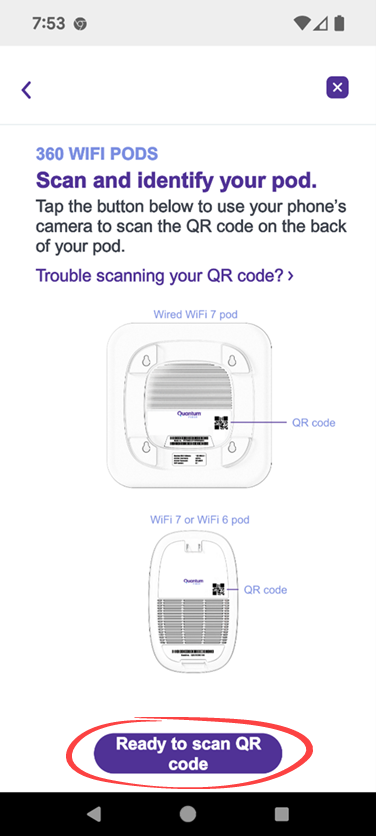
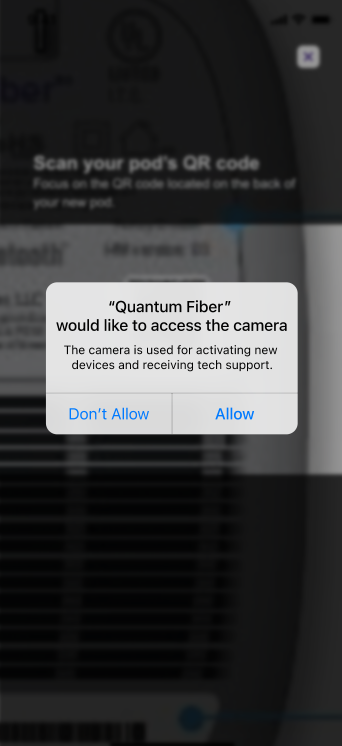
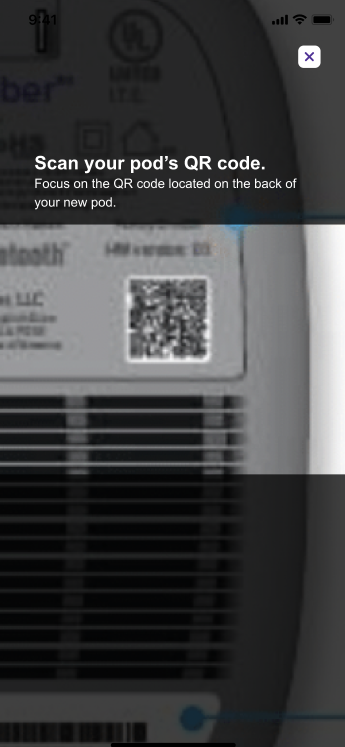
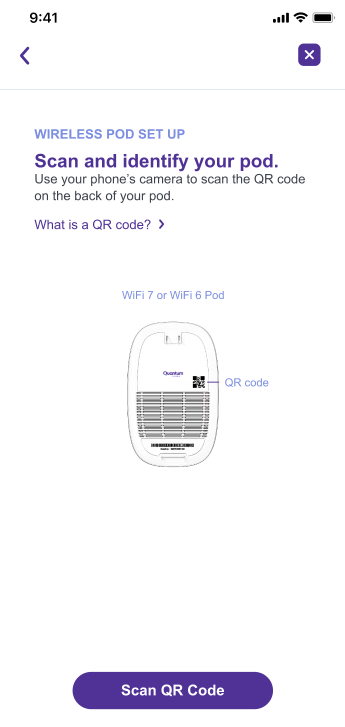
6. Use your phone to scan the QR code on the back of the wired pod W1700K. If you chose not to allow camera access, enter the pod's serial number manually instead.
Tip: If your phone can't scan the QR code on the pod, try scanning the one on the box it came in. Confirm that the serial number on the box matches the serial number on the pod; if not, you'll need to manually enter the serial number.
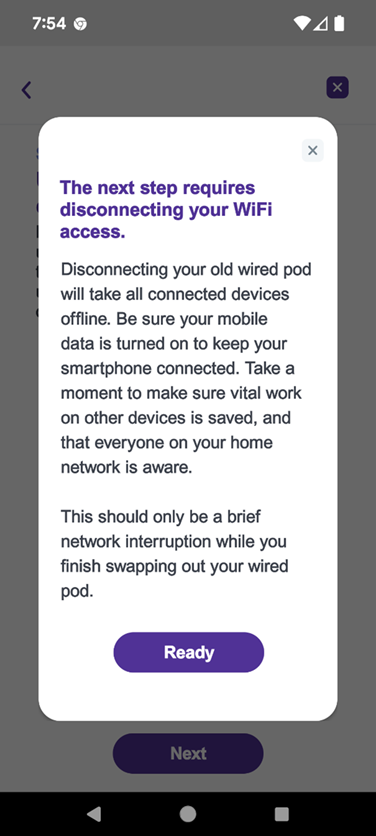
7. Review the popup message, which advises that your WiFi will go down temporarily once you unplug your existing wired pod. Tap Ready to proceed.
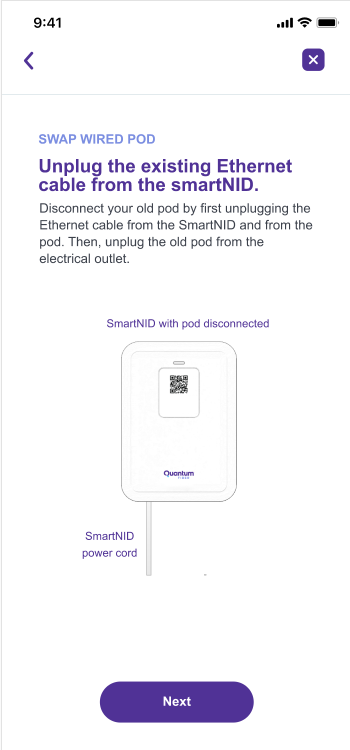
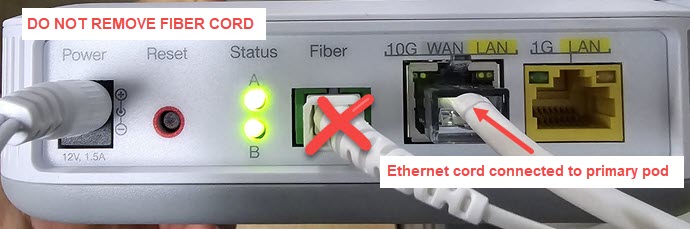
DO NOT UNPLUG THE FIBER CORD OR THE POWER CORD FROM THE SMARTNID.
Bottom view of C6500XK SmartNID (example only)
Your WiFi network will now turn off and your devices will go offline. Mobile devices can still connect to your mobile data network.
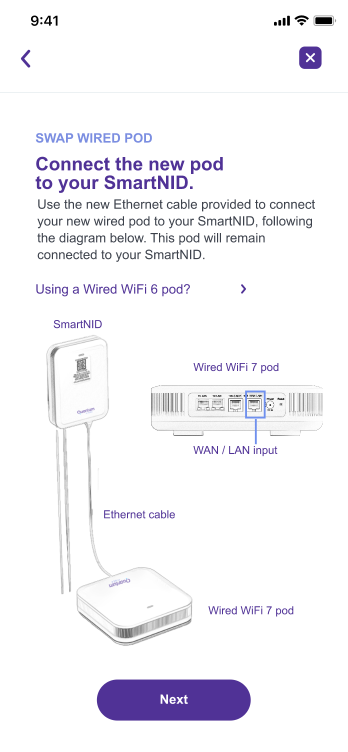
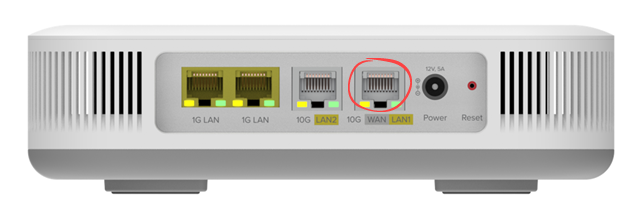
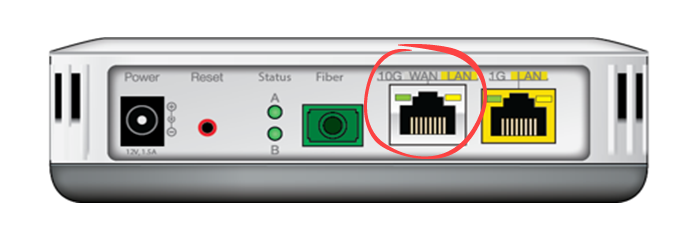
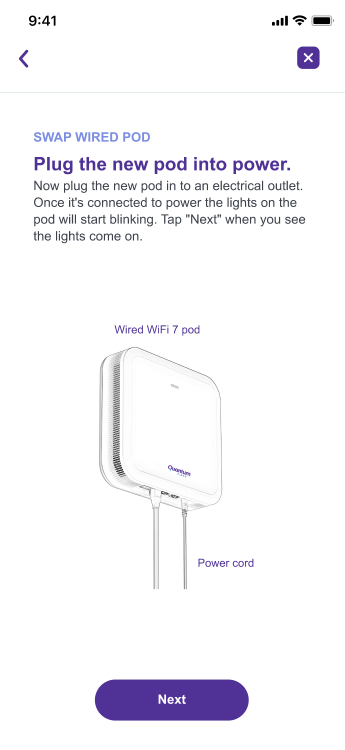
9. Connect your new wired pod to the SmartNID using the Cat6 Ethernet cable provided in the box. Plug the cord into the 10G WAN port on the wired pod, and into the correct port on the SmartNID (see images below). Then tap Next.
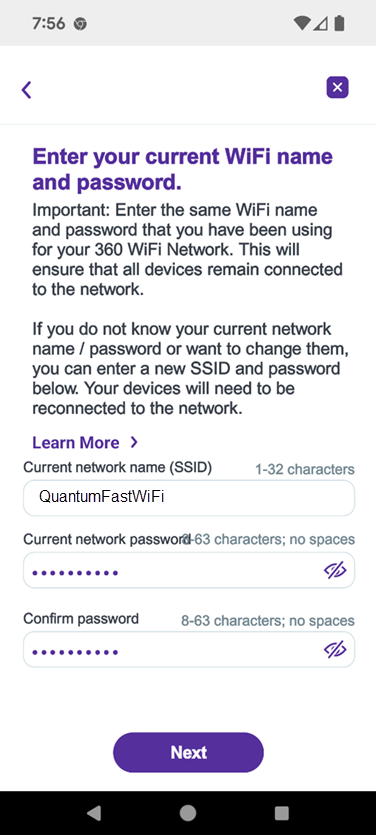
11. Enter your current network name and password. In some cases, these may be pre-filled. Enter the password again to confirm, then tap Next.
Note: Using the same network name and password you have now is ideal for a smooth transition. But, if you don't have your current WiFi network information, that's okay. You can enter a new SSID and password in this step. In this case, you'll then need to reconnect all your personal devices to the new network.
Note for Windows 10 devices - Password requirement
If you have a device running on the Windows 10 operating system, your WiFi password cannot contain any apostrophes (') or quotation marks ("). If these characters are used in your current password, please remove them and save a new password in order to connect devices and see your WiFi pods in the app.
This is only for Windows 10.
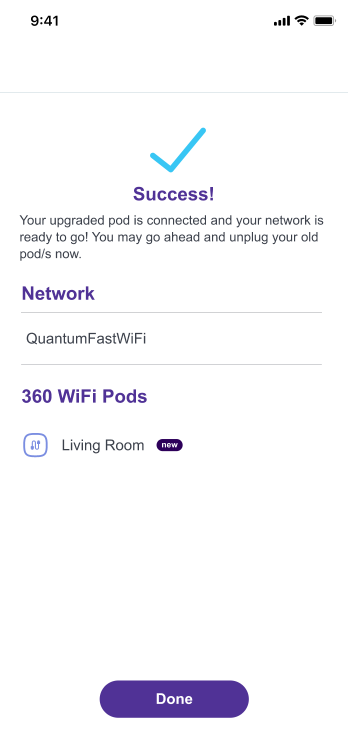
12. The system will now add the new wired pod to your network. When it's finished, a success screen will show the network name and wired pod. Tap Done.
Bug notice: Some customers are seeing an error screen that says Couldn't find your pod even when the pod was successfully added to the app. Try signing out of the app and then signing back in to see the pod listed in your network. We are working on resolving this issue and are sorry for the inconvenience.
Your WiFi network should turn back on and you should be able to connect your devices again. If you received just the one WiFi 7 wired pod, you're done!
Add a wireless pod (not for all customers)
Did you get a second pod?
If your shipment included a smaller wireless pod, continue with the next section. If not, skip to the last step.
If you got a wireless pod W1701K, follow steps 14 to 19 to connect it to your network. If you didn't receive one, don't worry.
You may not require a second WiFi 7 pod. These new pods are so powerful that many households get plenty of coverage with the one wired pod. Too many pods can cause interference and worse performance.
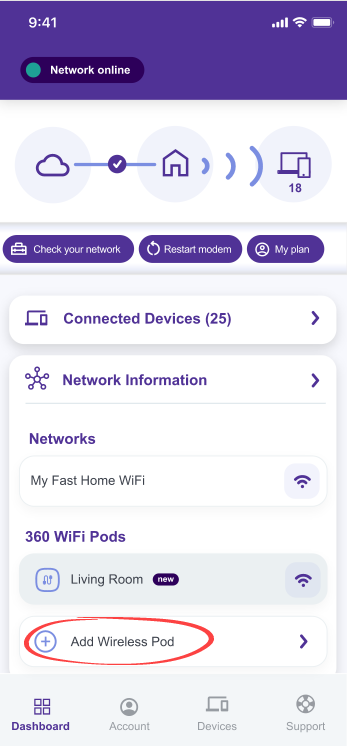
14. On the app home screen, scroll to the 360 WiFi Pods section, and tap Add Wireless Pod (or Install 360 WiFi Pods).
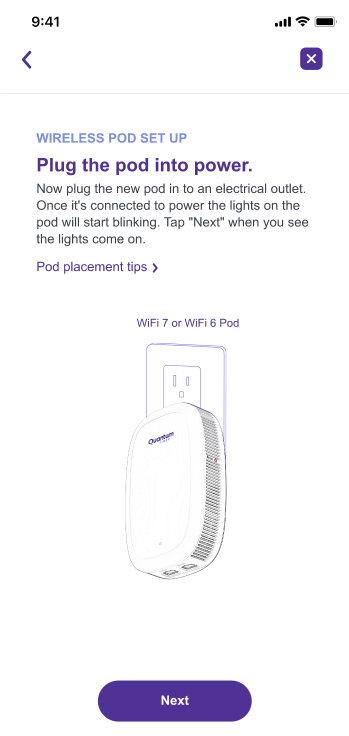
16. Plug the wireless pod into an electrical outlet in a central location. Do not plug into a power strip or splitter. Tap Next.
Wireless pod placement tips: For a single-level home, place the wireless pod mid-way between the farthest room where you need a wireless connection and the SmartNID + wired pod. For a multi-level home, place your wireless pod on a different level than the SmartNID + wired pod.
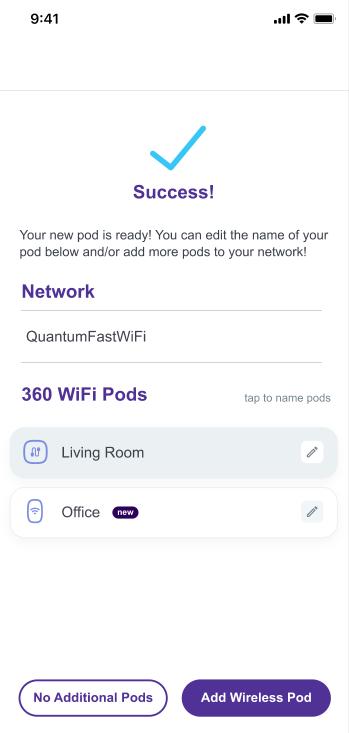
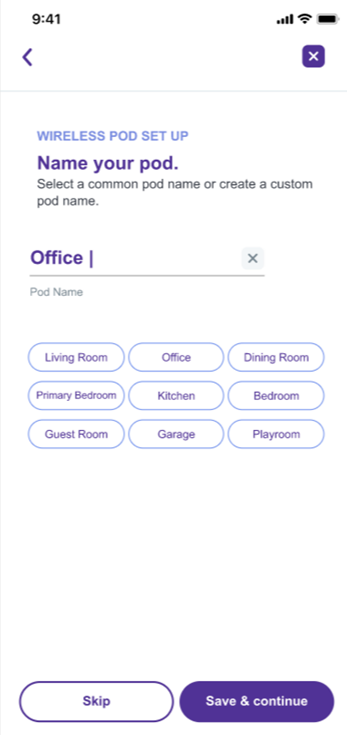
18. If you would like, you can assign a name to your pod. To do this, tap the small pencil icon to the right of the pod on the success screen. Select a preset option or enter your own pod name, then tap Save & Continue.
19. Back on the pods screen, tap No Additional Pods. You will be returned to the app home screen. Your network will optimize over the next 24 to 48 hours.
Do not continue to use the old WiFi 5 pods with the upgraded WiFi 7 pods.
After setting up your new pods, please return the old ones to us. Get a free return label, pack up the equipment safely, and ship it via UPS.
Need help setting up your 360 WiFi pods?
You can schedule a technician installation. Sign in to your online account > Select Shop > Select 360 WiFi > Look for the blue Schedule Install button.
Need more help? Chat with us here on the website, or you can start a chat in the app or the online portal. If you prefer to call, we're here 7 days a week 7 a.m. to 11 p.m. CST.